
 Fall and apples go together like peas in a pod or peanut butter and jelly. And whether youre taking advantage of the bounty from local u-pick orchards, a year-end farmers market haul, or the plentiful organic apple reservoir at your favorite grocery store, theres certainly no shortage of our states most famous fruit. Ciderboth refrigerator cold and stove-top warmreigns supreme this time of year. In our last post, we laid out the steps to make your own traditional homemade cider. But should you make a little more than you planned, or want to take it to the next level, you can follow the steps in our next two short posts to brew your very own hard apple cider. Hard Apple Cider Cider Aftermath Once youve made the cider following the steps in our previous post, youll want to make a trip to your local brewing store or online to find a good cider yeast. Dry wine yeasts can be a little easier to find and are sometimes a little less expensive. Yeast Starter Before you start making the hard cider, youll want to get a yeast starter going a few days prior. Youll want the yeast to be alive and kicking so you have more control over the final taste. Just add one yeast packet to half a cup of your freshly made cider in a sealable jar or bottle. Shake well for five or ten seconds and leave it be for five or six hours. Once you see bubbles building, twist the lid a bit to let the pressure equalize and then screw it back on before putting it in the fridge for a couple more hoursuntil youre ready to use it in your cider. Well be covering the final steps, everything from simmering to fermentation to bottling, in our next and concluding post.
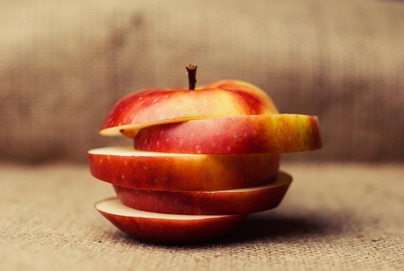
 Making Traditional Apple Cider, part 2
 Fall and apples go together like peas in a pod or peanut butter and jelly. And whether youre taking advantage of the bounty from local u-pick orchards, a year-end farmers market haul, or the plentiful organic apple reservoir at your favorite grocery store, theres certainly no shortage of our states most famous fruit. Ciderboth refrigerator cold and stove-top warmreigns supreme this time of year. In our last post, we laid out the steps to make your own traditional homemade cider. But should you make a little more than you planned, or want to take it to the next level, you can follow the steps in our next two short posts to brew your very own hard apple cider. Hard Apple Cider Cider Aftermath Once youve made the cider following the steps in our previous post, youll want to make a trip to your local brewing store or online to find a good cider yeast. Dry wine yeasts can be a little easier to find and are sometimes a little less expensive. Yeast Starter Before you start making the hard cider, youll want to get a yeast starter going a few days prior. Youll want the yeast to be alive and kicking so you have more control over the final taste. Just add one yeast packet to half a cup of your freshly made cider in a sealable jar or bottle. Shake well for five or ten seconds and leave it be for five or six hours. Once you see bubbles building, twist the lid a bit to let the pressure equalize and then screw it back on before putting it in the fridge for a couple more hoursuntil youre ready to use it in your cider. Well be covering the final steps, everything from simmering to fermentation to bottling, in our next and concluding post.